Mini Gnome Christmas Ornaments Tutorial Step By Step
How To Make MINI Christmas Gnome Ornaments Step By Step
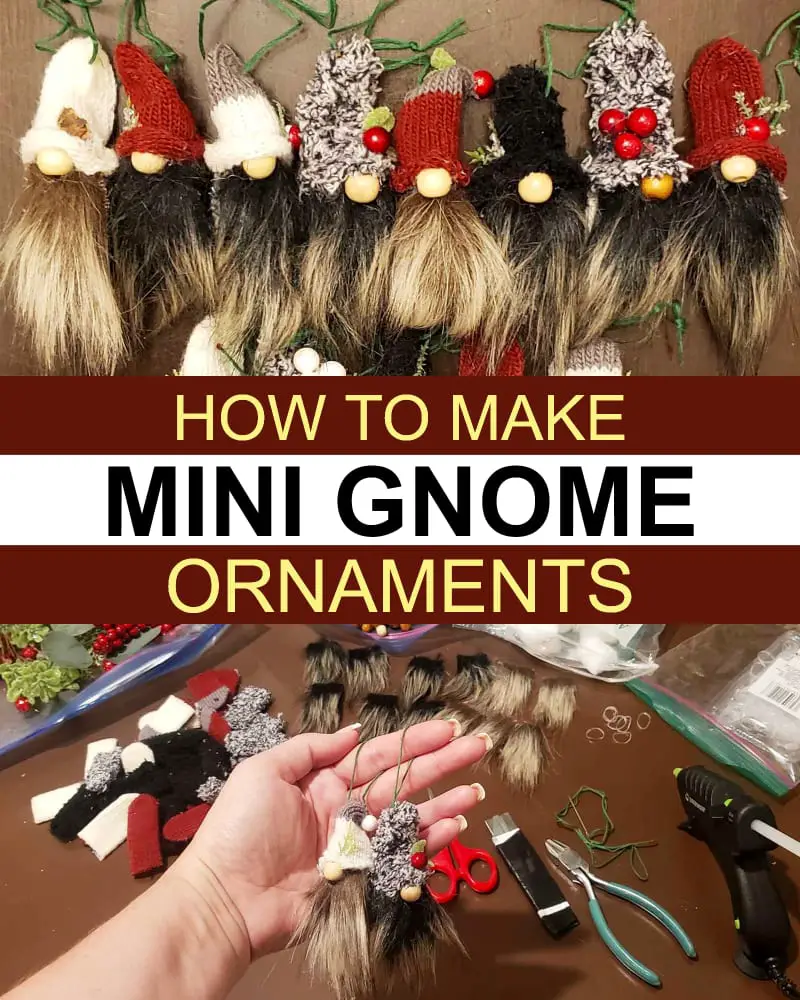
Let’s make the CUTEST mini-gnome Christmas ornaments in this step-by-step craft tutorial.
Posts may contain affiliate links and yes, there's ads too (that's how I keep the lights on here). Ads *should* reduce as you scroll down the page - thank you for understanding and for supporting the blogging community - we all work so hard! Enjoy and feel free to share on Pinterest or with your friends!
We’re going to turn cheap winter gloves into the most adorable Christmas gnomes.
Yep, those cheap-o knit winter gloves will become the gnome body AND the cute little gnome hats.
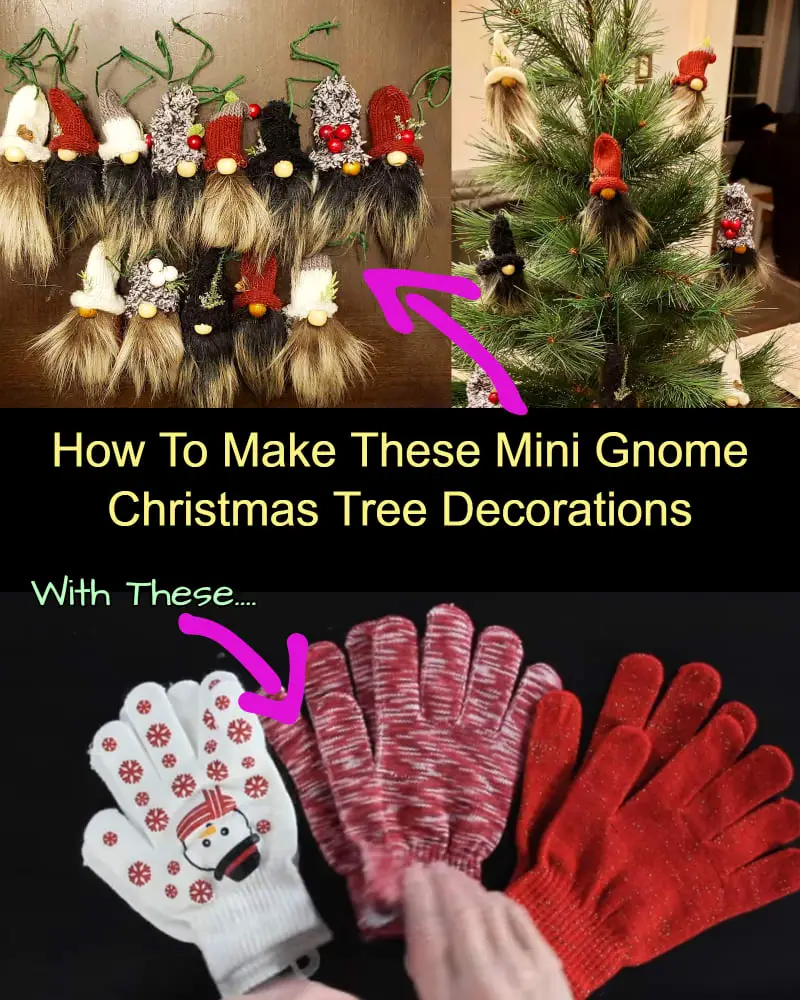
Here’s what you need:
Get some cheap ladies winter glovesFound Heresome cute fake fur in your color choiceFound Heresome wooden craft beadsFound Hereand some polyfilFound Hereget your plastic bandsFound Hereand your glue gunFound Here
DIY Instructions
If you’re pretty crafty, here are the basic instructions in pictures showing how to make these mini Christmas gnomes.
If you need more in-depth instructions, the tutorial video is below.
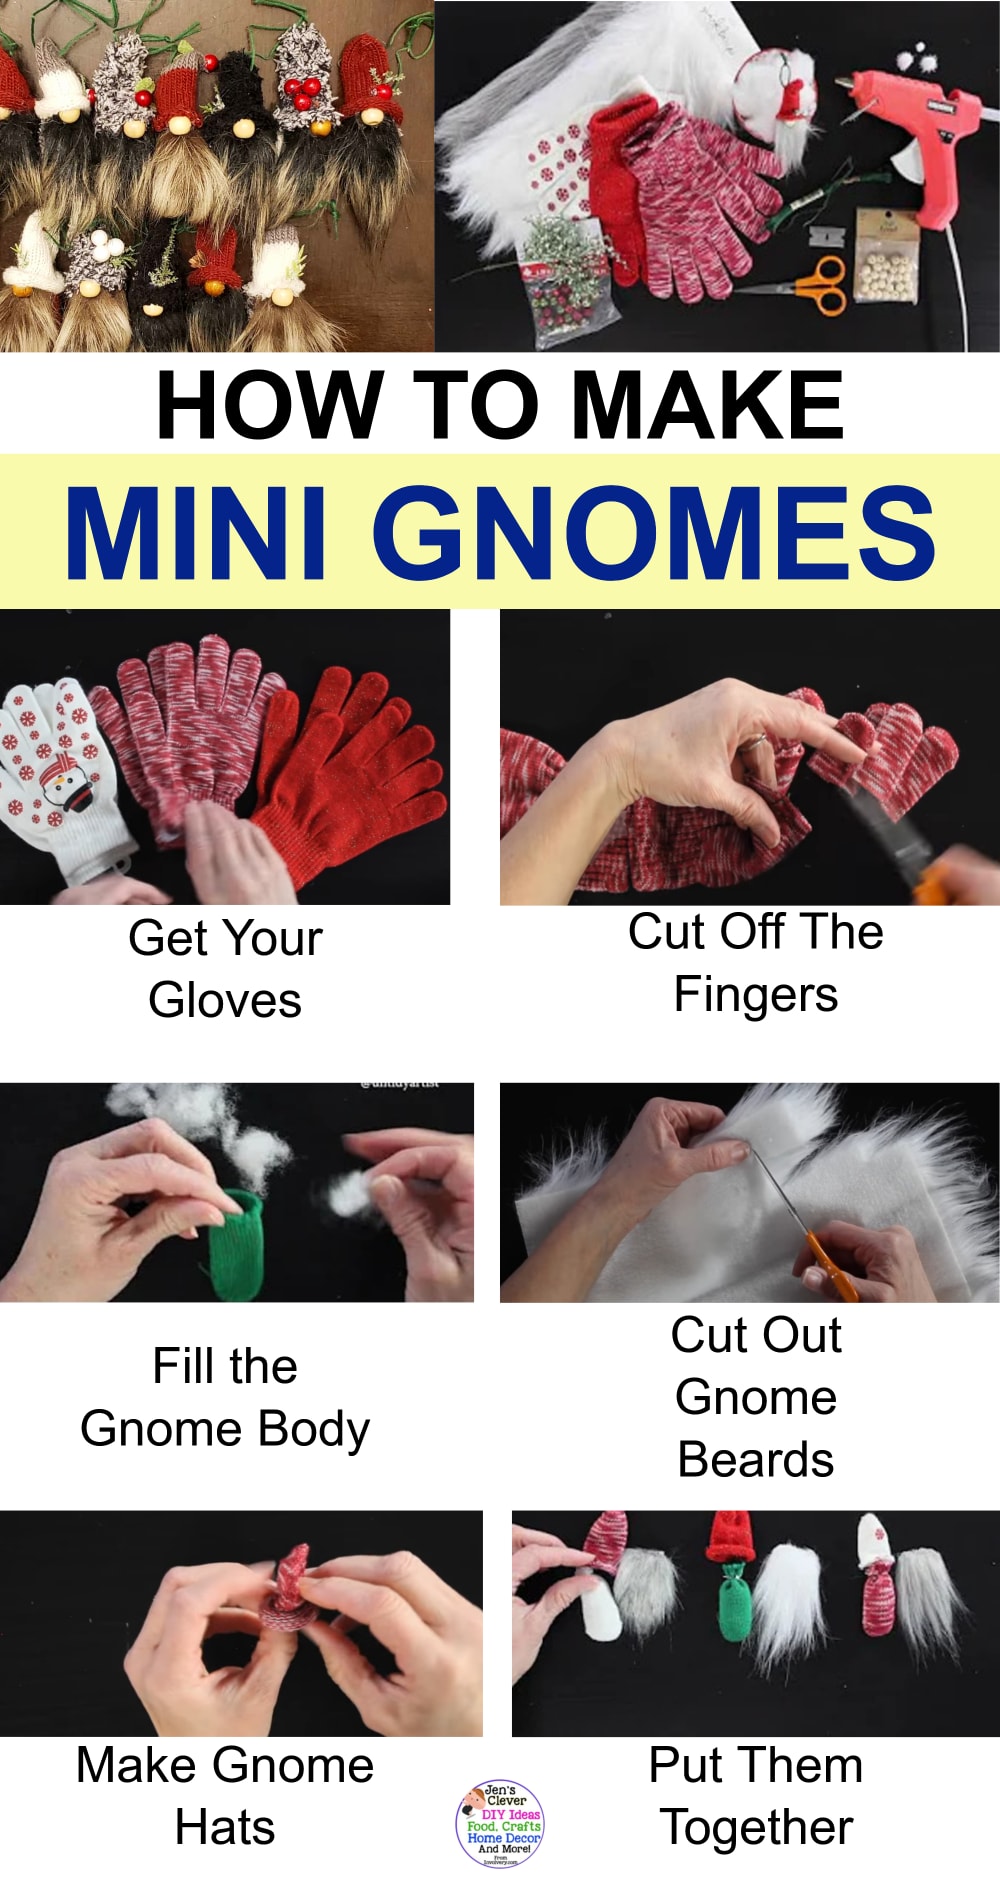
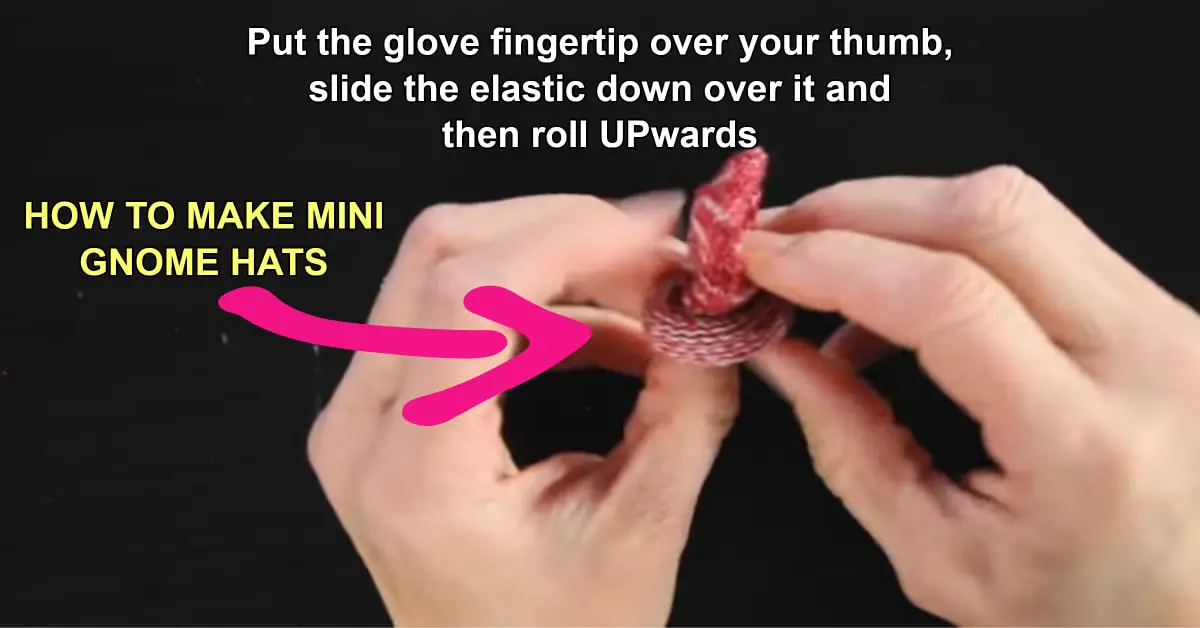
How To Make Gnome Hats
As you’ll see in the video tutorial below, making the gnome hats is pretty easy.
BUT, it seems to be the step most crafters get stuck on.
In short, what you’re going to do is slip a glove fingertip over your thumb, slide your clear elastic band down over the glove piece on your finger and roll the bottom up.
Yep, you’re basically making a little hat for your finger =)
Step-By-Step Tutorial Video
Here’s a complete walk-thru showing every step to make these precious little gnome ornaments yourself:
Tips & Tricks
A few questions and tips for making these gnomes…
What SIZE gloves? For these mini gnomes in the pictures, use ladies sized knitted winter gloves – BUT feel free to experiment with kid’s sizes and men’s sizes too.
If you do NOT have PolyFil, you can use cotton balls to stuff the gnome bodies.
To give your gnome ornaments a bit more decoration, take some embellishment pieces from a cheap Christmas tree pick decoration and hot glue it on.
In this tutorial, the gnome nose are made from little wooden craft beads, but you can use a button or a mini pom-poms or little beads – your gnomes, your choice =)
When cutting the fur for the gnome beard, many crafters struggle using a craft knife. Feel free to just use scissors – it works just as well (and for this accident-prone crafter, it’s MUCH safer haha!)
The fake fur pieces for each gnome beard measure about 1 inch wide and about 1 1/2 inches long.
Be sure to pull the fur back when cutting the beard length so you do no cut the fur off.
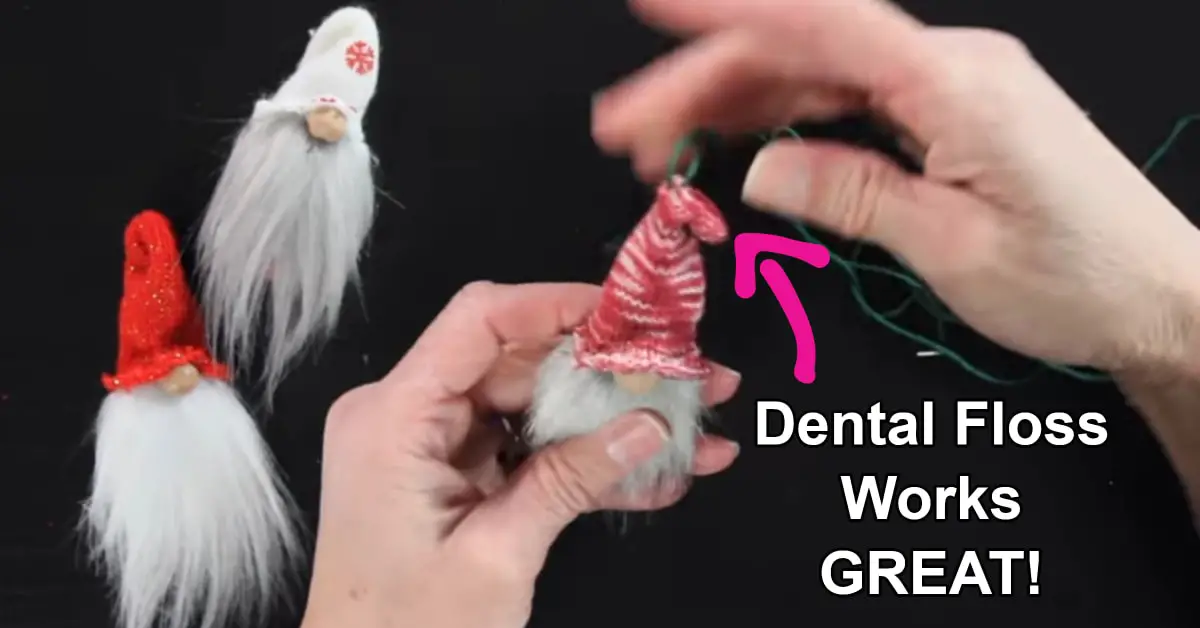
Instead of using ribbon for the gnome hangers, try using dental floss – the little bit of wax on the floss helps the ornaments stay in place on your tree better.
1/4 of a yard of the fake fur is MORE than enough to make these Christmas gnomes so don’t go overboard unless you use faux fur for other craft projects.
Many have asked me what the BACK of these mini gnomes look like…
This is the back of a gnome ornament:
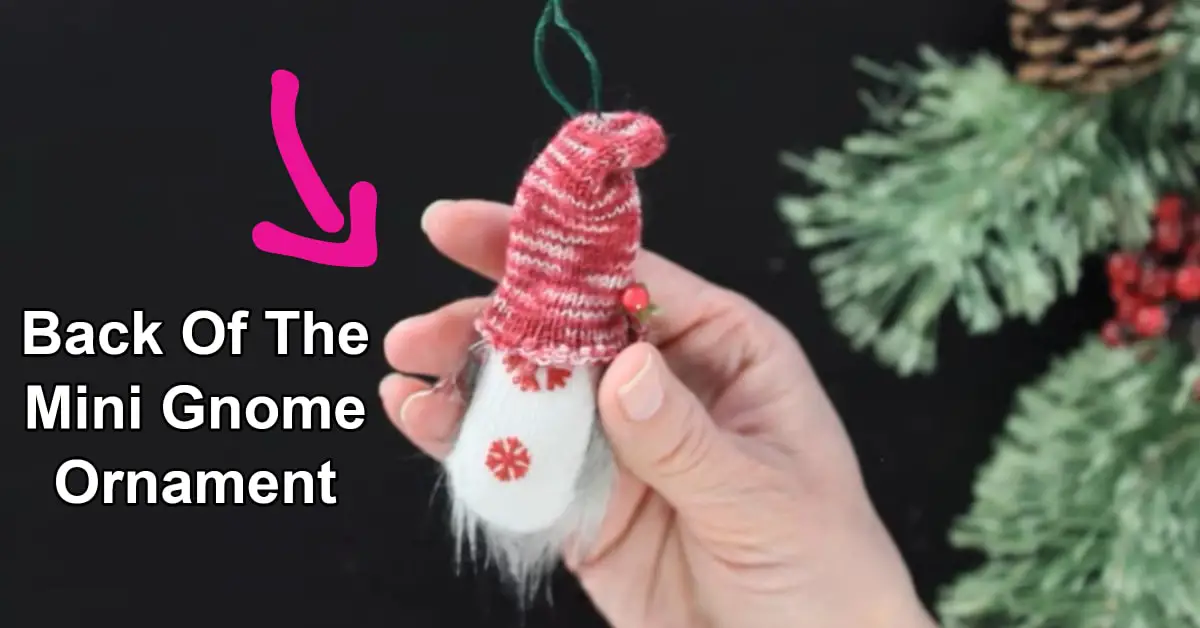
So, it’s not a bad idea to have a cute patterned glove piece for the gnome body in case your gnomes flip over or can be seen from the back.
Also – these mini gnomes don’t HAVE to be ornaments…
Use them as Christmas present decorations when wrapping…
Put a pin on the back and turn them into gnome PINS for your jacket.
Give them as gifts to your coworkers.
I’ve even seen folks make MINI mini gnomes and turn them into earrings!
Have fun with it… they are just PRECIOUS!
More Christmas Craft Tutorials
Miss a Step?
Click any link to go BACK:
[toc]


